Setting up Zoom
In this section, we’ll go through the process of creating a general application and setting up Zoom to access the Client ID and Client Secret.
NOTE: If you already have an application in Zoom and can access the Client ID and Client Secret, you can skip to Step 3.
Step 1: Create an application
Visit the Zoom application creation portal and create a "General" or "server-to-server" application based on your use case.

We need to create an application to get the Client ID and Client Secret. Each Client ID and Client Secret is connected to an application.
Step 2: Access the OAuth credentials
Once your application is created, you can easily access the Client ID and Client Secret.
Navigate to your just-created application.
Under the Basic Information tab, under App Credentials, you can find the Client ID and Client Secret.

Optionally, on the same application page, you can set basic information, such as the application's name and developer details, separately for the Development and Production environments.

Step 3: Set the Authorized Redirect URI
You’ll also need to configure the Authorized Redirect URI of the application to point to Composio’s callback URL.
In the OAuth Information section (just below the Client ID and Client Secret), add the following URL:
https://backend.composio.dev/api/v3/toolkits/auth/callback
Step 4: Configure Scopes
Scopes actually define which API methods the app is allowed to call. You can restrict it to resources like a specific channel or files.
By default, Zoom does not enable any scopes on your application. You need to enable the ones you require manually.
Under the Scopes tab, under Build your app, hit the + Add Scopes button to get a list of products with their scopes.
These are the default scopes supported by Composio.
device:read:admin, meeting:read, meeting:read:admin, meeting:write, meeting:write:admin, meeting_summary:read:admin, recording:read, recording:read:admin, recording:write, recording:write:admin, report:read:admin, webinar:read, webinar:read:admin, webinar:read:list_webinars:admin, webinar:write:registrant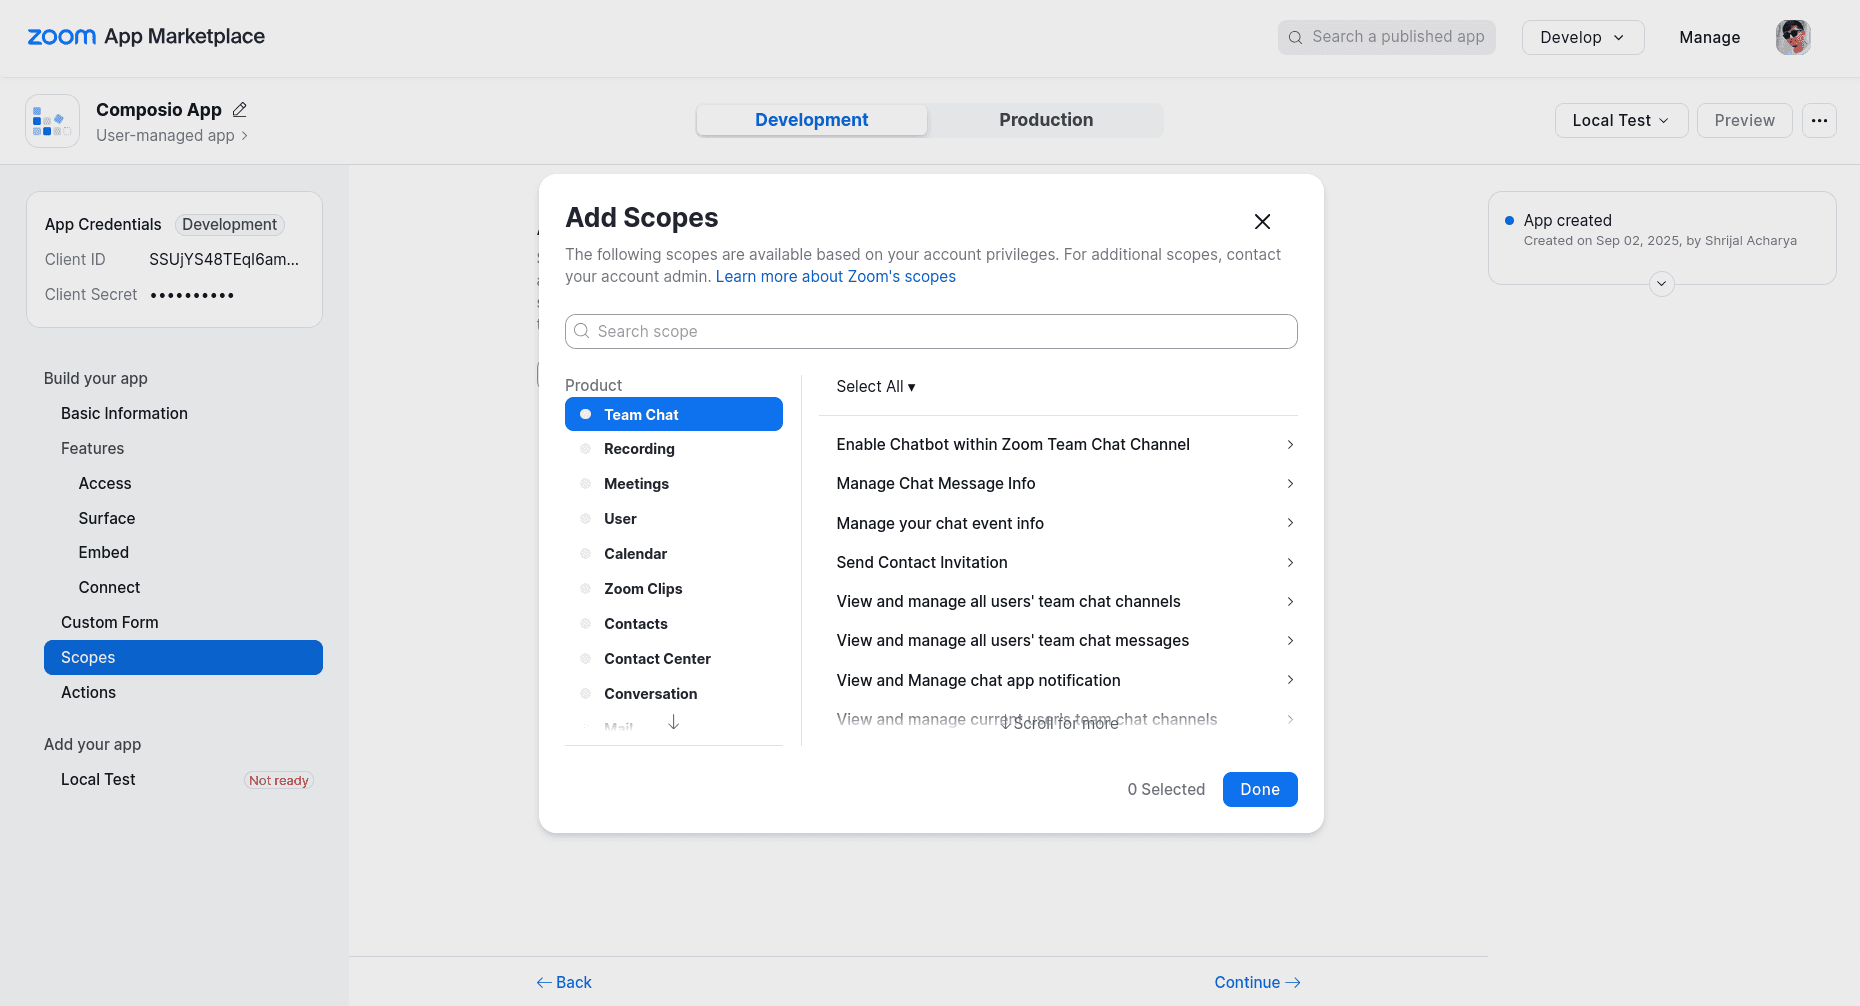
Now, choose the ones you require. For example, if you want to use all the team chat features, you can select all or pick the specific ones.
💡 QUICK TIP: If you're just starting out and aren't sure which ones to pick, and you want to test the implementation, I suggest you stay in the development environment. Choose "Select All" and then remove the unnecessary ones before using the app in production.
That’s all you need to set up on the Zoom side.
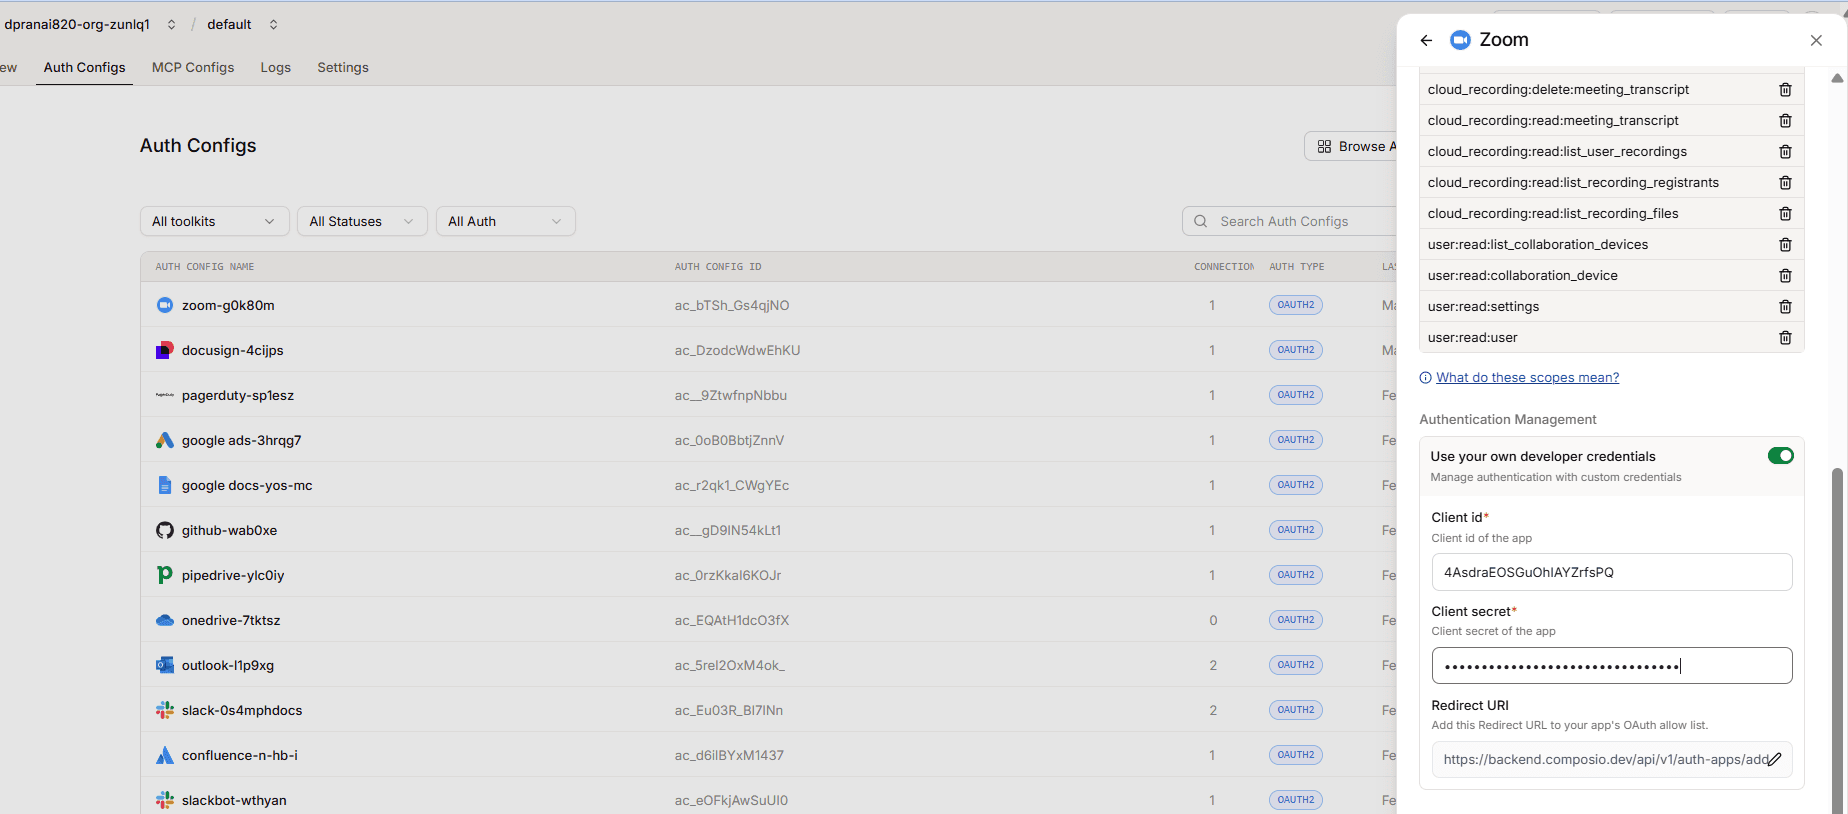
Creating the Auth Config in Composio
With your OAuth credentials ready, navigate to the Composio dashboard for your project to configure Zoom authentication settings.
Click on the Create Auth Config button to get a list of all the toolkits available.

In the sidebar that opens, choose Zoom for the toolkit. Ensure the authentication is set to OAuth2 as the default. There is no support for Bearer Token with Zoom.

Paste the Client ID and Client Secret you just copied from Zoom into their respective fields and use the same callbackurl you used creating zoom auth app.
https://backend.composio.dev/api/v3/toolkits/auth/callback
Finally lick on Create Zoom Auth Config..
To connect your Zoom account inside the Auth Config:

During the connection flow, click “Allow” on the Zoom authorization screen. Once you grant permission, your account will be successfully connected and ready to use.
Once you have set up the auth config for Zoom, you can go to the Manage Auth Config tab to make changes to any auth config fields. Here, you can also customize the auth scopes at the Composio level if needed. Default scopes are already pre-filled for most apps.

Finally, copy the auth config ID (which starts with ac_) and use it in your application code via a secret manager.
Your custom Zoom auth config is now ready to go! 🚀